Use the info below as a guide to getting your account set up. Click the Section Headers below to jump to a specific component of your account.
We offer a Premium Set Up to all Broker Plus users where we would set up the Customer-facing Application, Keyword and Short Code, Lenders and Mortgagee Clauses, Loan Estimate Templates for Fee Sheets, Custom Disclosure Forms for you and your team, and make sure your CRM is set up properly. The Premium Setup also includes dedicated one-on-one training with our CEO, Dru Brents. Send a detailed message to support@preapp1003.com for more info about the Premium Setup.
Account Setup Sections
Set Company Info
Various pieces of Company Info are vital to your account being set up properly. The Company Info you enter into your account will be shown on most of the Customer-Facing pages and is needed for compliance.
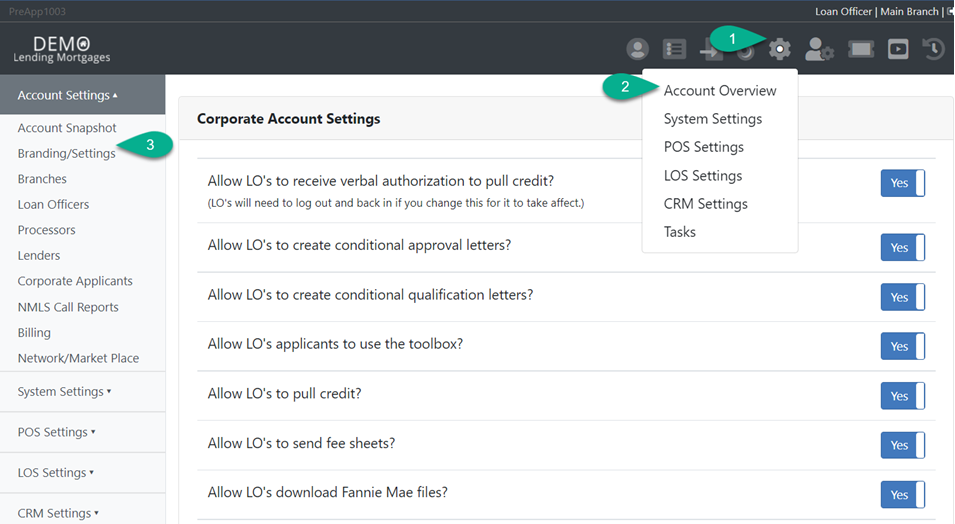
Get started by making sure the Branding/Settings page houses as much valid data as possible, and check that the various settings options are set to your liking.
Gear Icon > Account Overview > Branding/Settings
Set LO Information
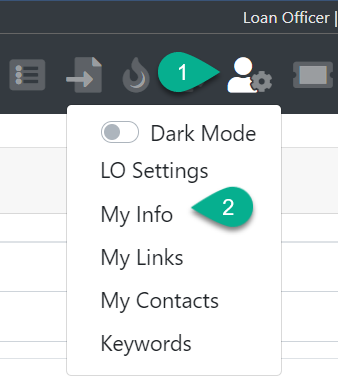
Just like Company Info will be shown to your clients, your contact info will be as well. You can set these data points on the My Info page.
LO Settings Icon > My Info
Set your ability to Pull Credit
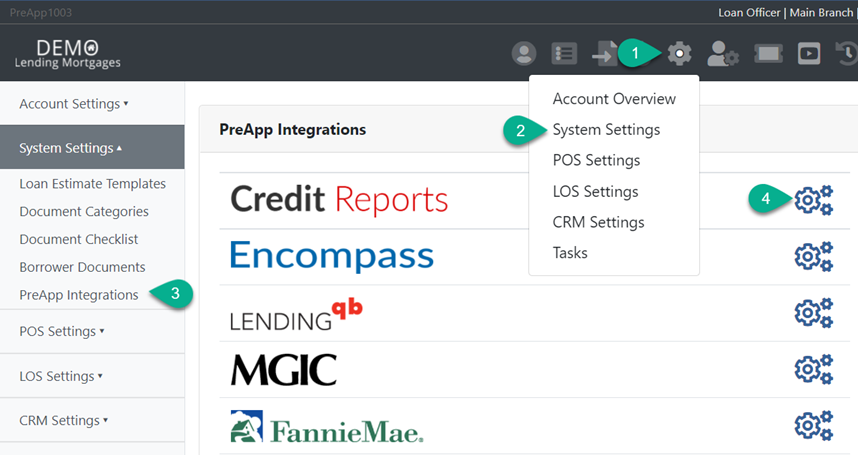
With PreApp, you have the ability to pull credit on your clients directly from inside their file. Get this function ready to go by integrating with your Credit Agency. You can do this on the PreApp Integrations page.
For more details about pulling credit through the system and getting this function operational, click here.
Set your ability to Run DO
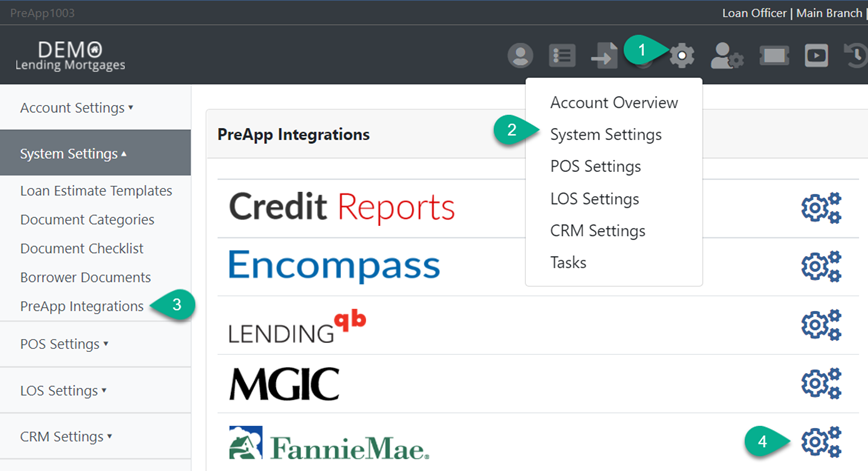
With the Broker LOS active in your account, you can get DO findings directly from inside your files. Get this function ready to go by setting up the Fannie Mae Integration page. You can do this on the PreApp Integrations page.
Gear Icon > System Settings > PreApp Integrations > Fannie Mae
For more details about running DO through the system and getting this function operational, click here.
Get your Application Link
Your PreApp account gives you a unique Application Link that you can quickly share with your clients. You can share the link via email, text message, or by copying and pasting it in another medium.
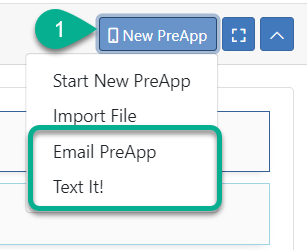
The quickest way to share your Application Link with someone is by logging into your account on any smart device and clicking the blue New PreApp button. You can opt to send it via text or email from here.
Choose Email or Text to quickly send the Application Link
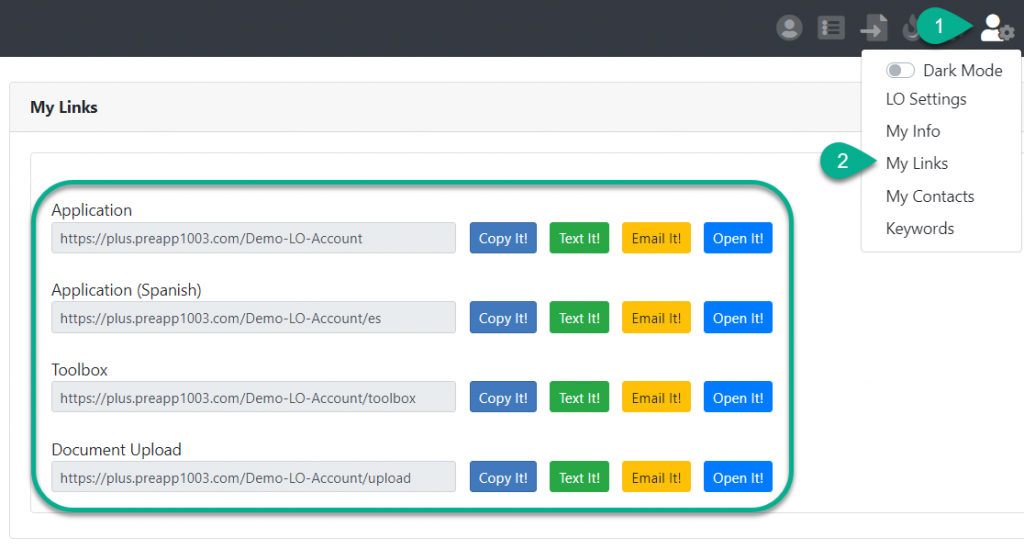
You can find all of your customer-facing links on the My Links page with quick-share buttons that allow you to get your links in front your clients with a simple click.
LO Settings Icon > My Links
The “Text It!” option will not appear without an active Keyword in your account. Learn more about the Keyword function in the next section.
Create your Keyword
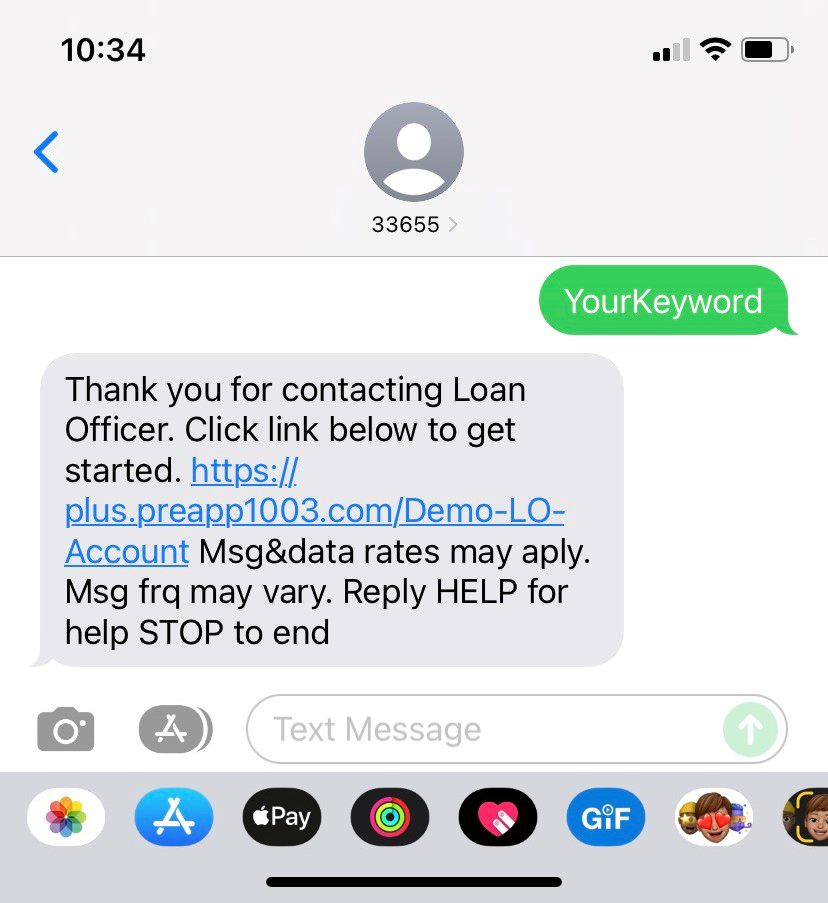
Your PreApp subscription allows you to create a Keyword for marketing. Anyone can send a text message to 33655 containing your Keyword to receive your Application Link automatically.
Text your Keyword to 33655 to receive your App Link automatically
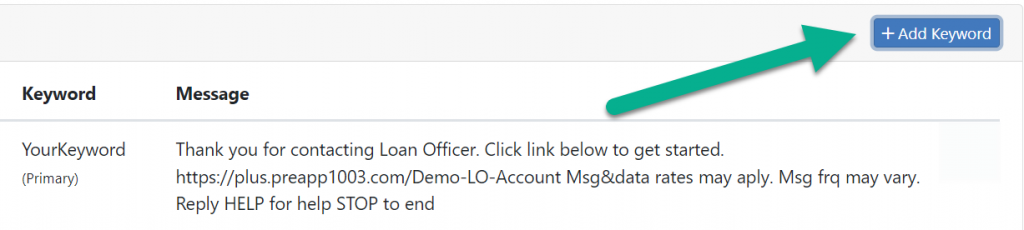
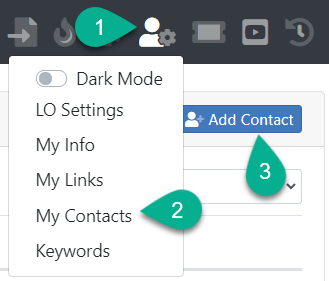
Create your Keyword on the Keywords page in your account.
LO Settings Icon > Keywords
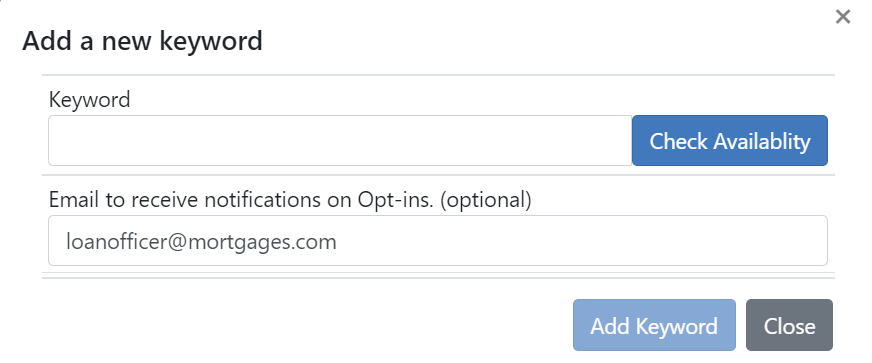
Click the blue "Add Keyword" button
The Keyword must not contain any spaces, and must be shown as Available after clicking the blue “Check Availability” button.
Enter your desired Keyword, Check Availability, then Add Keyword
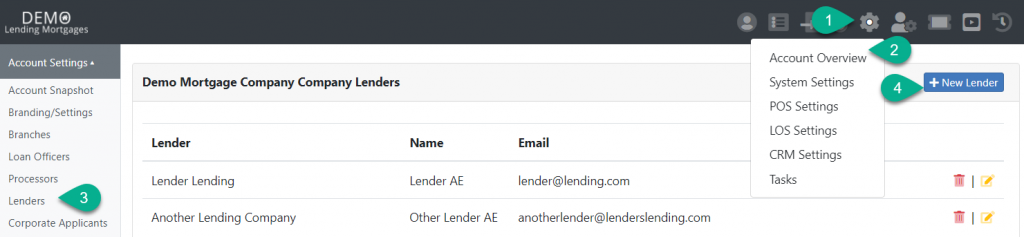
Add Lenders
Use the Lenders page to set up lender info for your account. Be sure to add the Lender Paid Comp. data for each Lender contact.
Gear Icon > Account Overview > Lenders > New Lenders
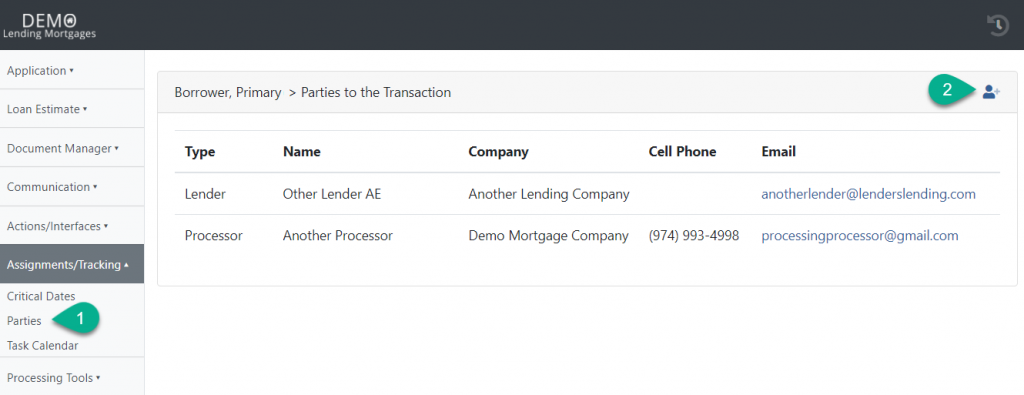
These Lenders can be added to a file’s Parties list on the Parties page inside the file.
Assignments/Tracking > Parties > Add Party
Add Mortgagee Clauses
Use the Contacts page to set up Mortgagee Clauses for your account. Simply add a space for required fields that you do not have data for.
LO Settings Icon > My Contacts > Add Contact
These Mortgagee Clauses can be added to a file’s Parties list on the Parties page inside the file.
Assignments/Tracking > Parties > Add Party
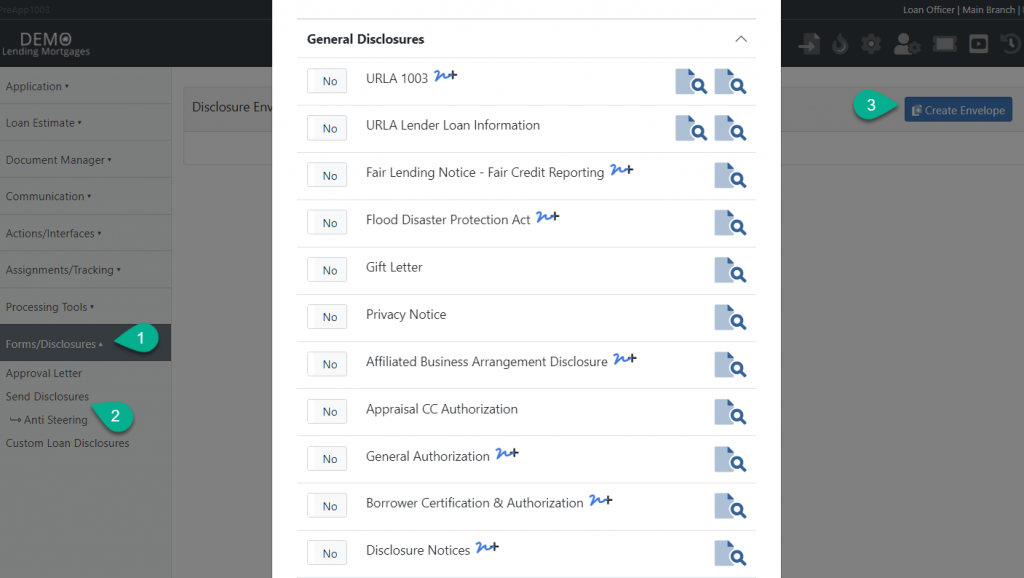
Set up Disclosure Forms
Users can quickly send dislosures forms to clients from inside the borrower file. Several forms are offered by the system for users to send. You can review the list of ready-to-use forms by moving to create a Disclosure Envelope for any file in your pipeline.
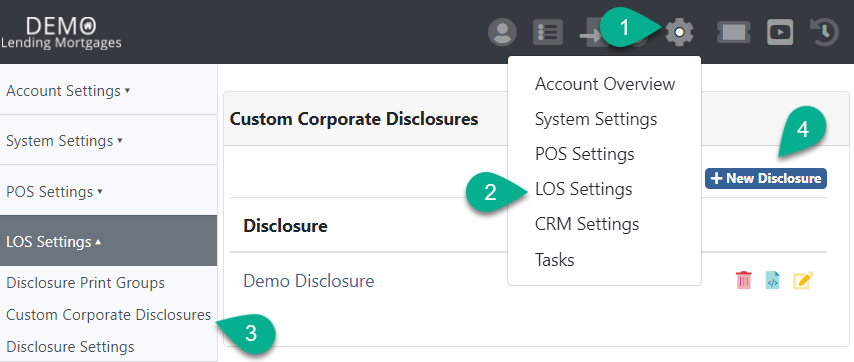
If the list of forms is missing forms that you need, you can add them in your account settings. Use the Custom Corporate Disclosures page to get this done. Note: be sure to use .pdf file format for any form that you want to be added to your Disclosure Library.
Gear Icon > LOS Settings > Custom Corporate Disclosures > New Disclosure
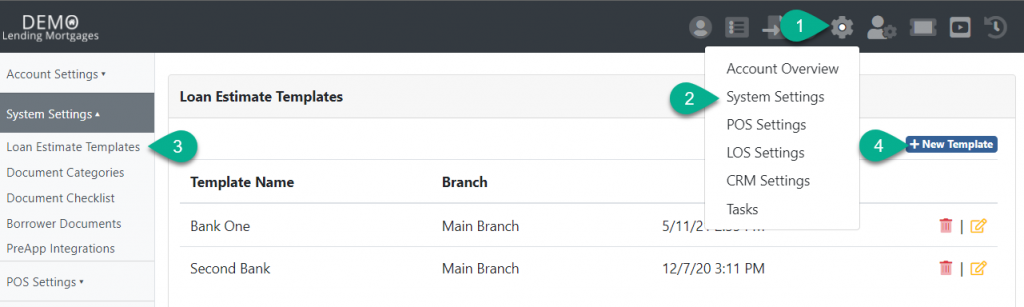
Create LE Templates
Loan Estimate Templates will be used to accurately determine Closing Costs when working loan scenarios in your files, and are vital to produce Fee Sheets for your clients. Set up these Templates on the Loan Estimate Templates page in your account.
Gear Icon > System Settings > Loan Estimate Templates > New Template
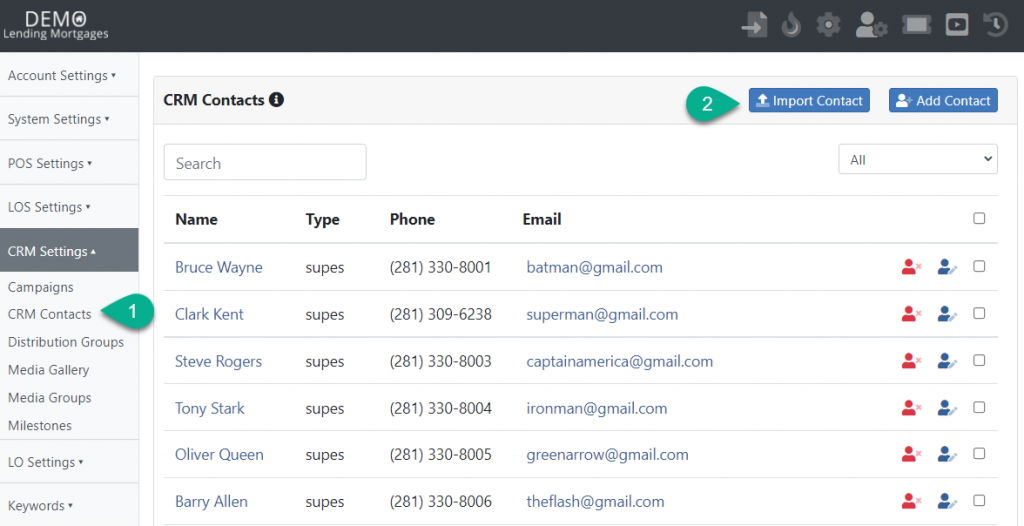
Import Contacts to your CRM
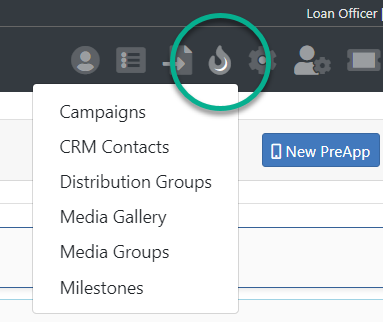
The CRM component of your account will automatically begin building an audience using the clients in your pipeline. This audience will receive CRM content based on the message and communication settings found throughout the various pages accessed under the Flame Icon on your dashboard.
Flame Icon
You can add as many contacts to this audience as you would like. To get this done quickly, import your contact lists in .xlsx or .csv file format. To do this, click the blue Import Contact button on the CRM Contacts page in your account. Note: when using column headers, the system will bring in data in all columns including those columns that are not matched/mapped when importing. This allows you to bring in as much customized data for each contact as you would like.
Flame Icon > CRM Contacts > Import Contact
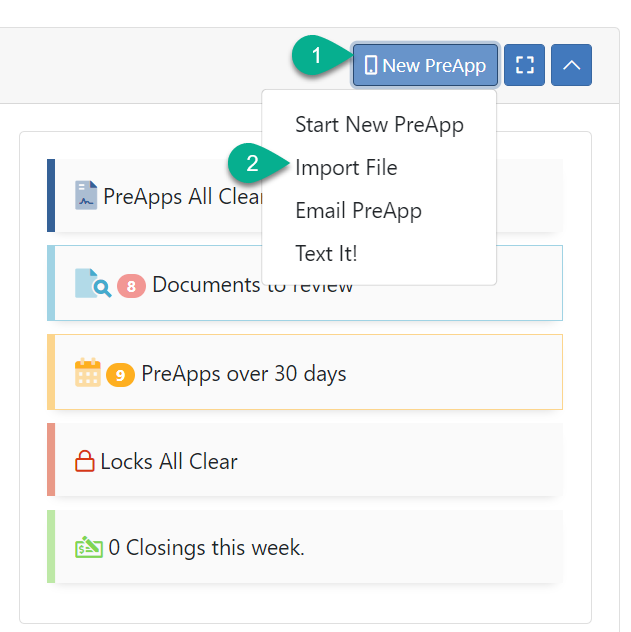
Import Files
If you have files that you are currently working on in a different system, you can easily bring them into your PreApp account. We encourage this so that NMLS Call Reports produced by the PreApp system will be as accurate as possible.
To import a external loan file into your PreApp pipeline, click the blue “New PreApp” button on the Pipeline page in your account, then select the Import File option. Browse your computer for the 3.4 .xml file you would like to import into your pipeline and upload it. (You are able to import 3.2 .fnm files this way also, but we always encourage users to import 3.4 .xml files as they are more thourogh and it is the most up-to-date file format.)
New PreApp > Import File
The page will refresh with your newly imported file showing as a application file in your PreApp pipeline.
Premium Setup
We offer a Premium Set Up to all Broker Plus users where we would set up the Customer-facing Application, Keyword and Short Code, Lenders and Mortgagee Clauses, Loan Estimate Templates for Fee Sheets, Custom Disclosure Forms for you and your team, and make sure your CRM is set up properly. The Premium Set Up also includes dedicated one-on-one training with our CEO, Dru Brents.
We use cookies to ensure that we give you the best experience on our website. If you continue to use this site we will assume that you are happy with it. Privacy policyGot it!